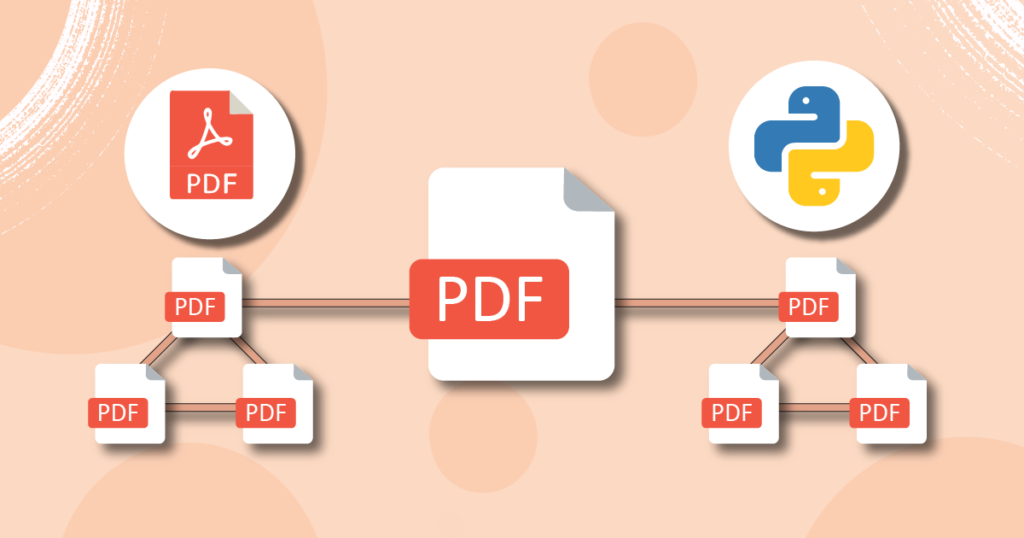
How to Generate PDF documents Using Python?
“Generating PDFs in Python is like painting a canvas with code, where every stroke brings data to life in a visual masterpiece.”
When was the last time you grappled with a PDF document? According to recent studies, approximately 85% of professionals encounter PDF documents daily, highlighting their pervasive presence in our lives. Among these, a significant 40% of individuals report spending over an hour each day dealing with tedious PDF-related tasks, such as formatting and creation.
We deal with a multitude of documents on a daily basis in our lives, and an overwhelming majority—around 75%—of these are indeed PDF documents. It is fair to claim that a lot of these documents are tediously repetitive, with over 60% of individuals finding them agonizingly painful to formulate. It’s staggering to note that inefficient document handling costs businesses an estimated 21.3% loss in productivity annually.
It is about time we considered leveraging the power of automation with Python. Notably, recent data suggests that Python’s popularity has surged by 27% in the last year alone, showcasing its relevance and usability. By automating these tasks, we can reclaim a substantial portion of our time—statistics indicate a potential time-saving of up to 30%—allowing us to focus on more pressing tasks in our lives.
Mind you, there is absolutely no need to be tech-savvy. What we are going to do here should be trivial enough that our inner un-savvy laymen can tackle in short order. After reading this blog, you will learn how to generate PDF documents with your own data automatically, charts, and images, all bundled together with a brilliant structure.
Did you know?
Surveys indicate that over 70% of individuals express interest in learning basic automation tools like Python, emphasizing its accessibility.
Table Of Content
➤ Why is Python Used Over Other Programming Languages In PDF Generation?
➤ How To Install Python On Your Computer?
- Installing Python on Windows
- Installing Python on macOS
- Installing Python on Linux
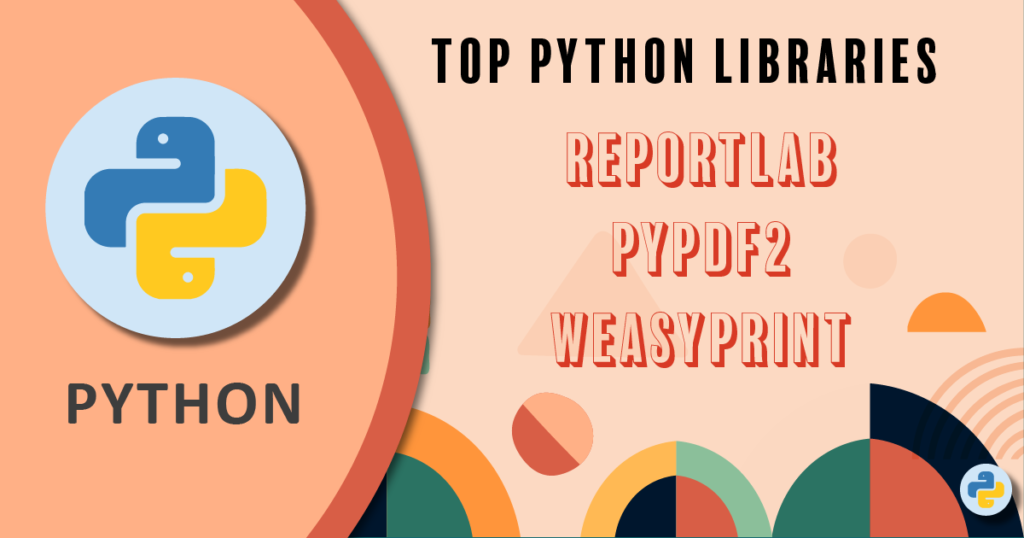
➤ What are the popular libraries for Python PDF generation?
- ReportLab
- PyFPDF
- WeasyPrint
➤ How to generate multiple PDFs from Excel data using python?
➤ Generating multiple PDFs using CRM data
➤ Tips for Optimizing Python PDF Generation Performance
➤ Pros and Cons of generating PDFs through Python
➤ The Power of Perfect Doc Studio in Simplifying Document Generation
➤ Conclusion
Why Python Is Used Over Other Programming Languages In Python PDF Generation?
Among the programming languages specialized in generating PDFs, like Python, Java, C#, and PHP, each has unique traits that impact their suitability concerning simplicity, performance, and relevance to particular use scenarios.
The question is, what stands out for its exceptional simplicity, versatility, and the extensive array of PDF libraries available to support its functionalities?
Python truly stands out, yes!
It’s known for its simplicity, versatility, and the robust support it gets from various PDF libraries. What makes Python outstanding is its way of connecting with developers. It’s user-friendly, catering to both beginners and seasoned pros alike. With tools like ReportLab, PyPDF2, and PDFMiner, Python becomes the ultimate platform for creating PDFs—a breeze for developers at any skill level.
What truly sets Python apart is its vibrant and engaged community, which ensures a wealth of resources and comprehensive documentation. This support network significantly eases the learning curve, enabling developers to swiftly leverage Python’s capabilities in PDF generation without much hassle.
Central to Python’s prowess is its expansive and engaged community, fostering an abundance of resources and comprehensive documentation. This wealth of support significantly mitigates the learning curve, enabling developers to swiftly harness Python’s capabilities in PDF generation.
And the best part is the compatibility, which facilitates a seamless execution of code across diverse operating systems. This inherent feature ensures consistent and reliable PDF generation experiences, irrespective of the underlying platform.
Sure, Java, C#, and PHP have their perks, no doubt about it.
But Python? It takes the win with its all-inclusive, user-friendly, and adaptable solution tailored to pretty much any PDF generation need you throw its way. That’s why it’s the top pick for countless developers and organizations – striking that perfect balance between functionality, ease of use, and versatility.
How to install Python on your computer?
To install Python on your computer, perform the following steps:
Installing Python on Windows

1. Downloading Python:
Visit the [official Python website] (https://www.python.org/downloads/) and download the latest version suitable for your Windows architecture (32-bit or 64-bit).
2. Running the Installer:
Locate the downloaded file (typically named something like `python-3.x.x.exe`) and double-click it to start the installation process.
3. Installation Setup:
Check the box that says “Add Python x.x to PATH.” This step is essential as it allows you to run Python from the command line more easily.
Click “Install Now” to start the installation process.
4. Verify Python Installation:
Open Command Prompt by searching for “cmd” in the Start menu.
Type `python –version` or `python -V` and press Enter. You should see the installed Python version displayed.
Installing Python on macOS
1. Downloading Python:
Visit the [official Python website] (https://www.python.org/downloads/) and download the latest version suitable for macOS.
2. Running the Installer:
Open the downloaded `.dmg` file, and double-click the Python.mpkg file to start the installation.
3. Installation Setup:
Follow the instructions on the installer. Make sure to select the option to “Install shell command” to use Python from the terminal.
4. Verify Python Installation:
Open Terminal and type `python3 –version` or `python3 -V` and press Enter. You should see the installed Python version displayed.
Installing Python on Linux
1. Using Package Manager:
Open the terminal and use the package manager for your distribution. For Ubuntu/Debian, use:
sudo apt-get update
sudo apt-get install python3
2. Verify Python Installation:
In the terminal, type `python3 –version` or `python3 -V`. You should see the installed Python version displayed.
Additional Notes:
- Virtual Environments: Consider creating a virtual environment using `venv` or `virtualenv` to manage project dependencies.
- To create a virtual environment:
python3 -m venv myenv
- Package Managers: Utilize `pip`, Python’s package manager, to install additional packages:
- Example: `pip install package_name`
Note: Remember to update Python regularly and its packages using `pip`. This ensures you have the latest features and security patches.
What are the popular libraries for Python PDF generation?
When it comes to generating PDFs using Python, several powerful libraries stand out, each offering its unique set of features and functionalities. Here, we will delve into three popular libraries – ReportLab, PyFPDF, and WeasyPrint.
ReportLab
ReportLab is a robust Python PDF generation library that allows creating complex, data-driven PDFs. It provides support for various elements like text, images, vector graphics, and more.
What it supports:
- Creation of PDF documents from scratch.
- Support for vector graphics and charts.
- Advanced layout control.
- Integration with various data sources.
Python Script:
Here’s an example of how you might generate a simple PDF using ReportLab:
From reportlab.pdfgen import canvas

def generate_pdf(file_name):
    c = canvas.Canvas(file_name)
    c.drawString(100, 750, "Hello, ReportLab!")
    c.save()

if __name__ == "__main__":
    generate_pdf("reportlab_example.pdf")
Explanation:
- `reportlab.pdfgen.canvas` is imported to create a canvas to draw on.
- `generate_pdf` is a function that creates a canvas object, adds text at specific coordinates, and then saves it as a PDF file.
Creating Tables:
You can use the `Table` class from `reportlab.platypus` to create tables. Here’s an example:
from reportlab.lib.pagesizes import letter
from reportlab.pdfgen import canvas
from reportlab.platypus import Table, TableStyle

def generate_pdf_with_table(file_name):
    c = canvas.Canvas(file_name, pagesize=letter)

    # Create table data
    data = [
        ['Name', 'Age', 'Country'],
        ['Alice', '25', 'USA'],
        ['Bob', '30', 'Canada'],
        ['Charlie', '28', 'UK']
    ]

    # Create a table
    table = Table(data)
    # Add style to the table
    style = TableStyle([('BACKGROUND', (0, 0), (-1, 0), 'gray'),
                        ('TEXTCOLOR', (0, 0), (-1, 0), 'white'),
                        ('ALIGN', (0, 0), (-1, -1), 'CENTER'),
                        ('FONTNAME', (0, 0), (-1, 0), 'Helvetica-Bold'),
                        ('BOTTOMPADDING', (0, 0), (-1, 0), 12),
                        ('BACKGROUND', (0, 1), (-1, -1), 'lightgray'),
                        ])
    table.setStyle(style)

    # Draw the table on the PDF
    table.wrapOn(c, 400, 200)
    table.drawOn(c, 80, 600)

    c.save()

# Generate PDF with a table
file_name = "pdf_with_table.pdf"
generate_pdf_with_table(file_name)
This example creates a PDF with a table containing some sample data. You can modify the `data` variable to include your own data and adjust the table style by modifying the `TableStyle` object.
Creating Lists:
To create lists, you can use `reportlab.platypus`’s `ListFlowable`. Here’s a basic example:
from reportlab.lib.pagesizes import letter
from reportlab.pdfgen import canvas
from reportlab.platypus import ListFlowable

def generate_pdf_with_list(file_name):
    c = canvas.Canvas(file_name, pagesize=letter)

    # Create list data
    data = ['Item 1', 'Item 2', 'Item 3', 'Item 4']

    # Create a ListFlowable
    list_flowable = ListFlowable([f"{i}. {item}" for i, item in enumerate(data, start=1)])

    # Draw the list on the PDF
 list_flowable.wrapOn(c, 400, 200)
    list_flowable.drawOn(c, 100, 600)

    c.save()

# Generate PDF with a list
file_name = "pdf_with_list.pdf"
generate_pdf_with_list(file_name)
Complex Formatting:
For more complex formatting, you can combine various Platypus elements (like Paragraphs, Tables, Lists, etc.) within a `Frame`. This allows you to position and style different elements precisely within the document.
Remember to adjust the coordinates, sizes, and styles according to your requirements when creating more complex layouts.
Embedding Fonts:
- Installing Fonts: Ensure you have the font file (TTF or OTF format) available locally.
- Embedding Fonts in ReportLab:
Here’s an example of how to embed a custom font in your PDF using ReportLab:
from reportlab.lib.pagesizes import letter
from reportlab.pdfgen import canvas
from reportlab.pdfbase.ttfonts import TTFont
from reportlab.pdfbase import pdfmetrics

def generate_pdf_with_custom_font(file_name):
    c = canvas.Canvas(file_name, pagesize=letter)

    # Register the custom font
    custom_font_path = "path/to/your/custom_font.ttf"  # Replace with your font path
    pdfmetrics.registerFont(TTFont('CustomFont', custom_font_path))

    # Use the custom font
    c.setFont("CustomFont", 12)
    c.drawString(100, 700, "Text using Custom Font")

    c.save()

# Generate PDF with a custom font
file_name = "pdf_with_custom_font.pdf"
generate_pdf_with_custom_font(file_name)
Replace “path/to/your/custom_font.ttf” with the actual path to your custom font file.
Customizing Text Appearance:
ReportLab allows customization of text appearance including font size, color, alignment, etc.
# Use different text appearances
c.setFont("Helvetica", 12)  # Set font and size
c.setFillColorRGB(1, 0, 0)  # Set text color (RGB)
c.drawString(100, 700, "Red Text")

# Changing text alignment
c.setFont("Helvetica", 12)
c.drawCentredString(300, 600, "Centered Text")

# Applying different font styles
c.setFont("Helvetica-Bold", 12)
c.drawString(100, 500, "Bold Text")

c.setFont("Helvetica-Italic", 12)
c.drawString(100, 450, "Italic Text")

# Using different font families
c.setFont("Times-Roman", 12)
c.drawString(100, 400, "Times Roman Font")
These examples demonstrate how to set text appearance such as color, alignment, styles (bold, italic), and different font families in a PDF using ReportLab.
Remember to adjust the coordinates and other parameters according to your document layout and requirements.
Running the Python Code:
Save this script in a file, e.g., `reportlab_example.py`, and execute it. It’ll generate a PDF named `reportlab_example.pdf` in the same directory.
Adding Watermarks:
from reportlab.lib.pagesizes import letter
from reportlab.pdfgen import canvas
from reportlab.lib.colors import Color

def add_watermark(input_file, output_file, watermark_text):
    # Open existing PDF
    existing_pdf = canvas.Canvas(input_file, pagesize=letter)

    # Create a new PDF with the watermark
    new_pdf = canvas.Canvas(output_file, pagesize=letter)

    # Watermark settings
    watermark_color = Color(0.6, 0.6, 0.6, alpha=0.3)
    font_name = "Helvetica"
    font_size = 50

    # Loop through each page of the existing PDF
    for page_num in range(1, existing_pdf.getPageNumber() + 1):
        # Draw the existing content to the new PDF
        existing_pdf.showPage()
        existing_pdf.save()
        new_pdf.save()
        new_pdf = canvas.Canvas(output_file, pagesize=letter)
        new_pdf.saveState()

        # Set watermark properties
        new_pdf.setFillColor(watermark_color)
        new_pdf.setFont(font_name, font_size)

        # Position the watermark in the center of the page
        text_width = new_pdf.stringWidth(watermark_text, font_name, font_size)
        text_height = font_size
        x = (letter[0] - text_width) / 2
        y = (letter[1] - text_height) / 2

        # Draw the watermark
        new_pdf.drawString(x, y, watermark_text)

        new_pdf.restoreState()
        new_pdf.showPage()

    new_pdf.save()
    existing_pdf.save()

# Usage example
input_file_path = "path/to/existing_pdf.pdf"  # Replace with your existing PDF path
output_file_path = "path/to/output_pdf_with_watermark.pdf"  # Replace with desired output path
watermark_text = "Confidential"  # Watermark text

add_watermark(input_file_path, output_file_path, watermark_text)
This script opens an existing PDF, duplicates each page, adds a watermark, and saves the modified pages to a new PDF.
Adding Page Numbers:
To add page numbers to a PDF, you can use ReportLab’s PageTemplate and PageNumber functionalities:
from reportlab.lib.pagesizes import letter
from reportlab.platypus import SimpleDocTemplate, PageTemplate, Frame
from reportlab.lib.styles import getSampleStyleSheet

def add_page_numbers(input_file, output_file):
    # Create a Story (content) for the PDF
    story = []

    # Define page templates with frames for the page number
    page_number_style = getSampleStyleSheet()["Normal"]
    page_number_frame = Frame(0, 0, letter[0], letter[1], id='normal')
    page_number_template = PageTemplate(id='test', frames=[page_number_frame])

    # Add page number to the template
    def add_page_number(canvas, doc):
        page_num = canvas.getPageNumber()
        text = "Page %s" % page_num
        canvas.saveState()
        canvas.setFont(page_number_style.fontName, page_number_style.fontSize)
        canvas.drawString(letter[0] - 100, 20, text)
        canvas.restoreState()

    page_number_template.beforeDrawPage = add_page_number

    # Open existing PDF and create a new PDF with page numbers
    pdf = SimpleDocTemplate(output_file, pagesize=letter)
    pdf.addPageTemplates([page_number_template])

    # Add content (if any) to the story
    # For example: story.append(Paragraph("Your content goes here.", getSampleStyleSheet()["Normal"]))
    # Add your content here

    # Build the PDF
    pdf.build(story)

# Usage example
input_pdf_path = "path/to/existing_pdf.pdf"  # Replace with your existing PDF path
output_pdf_path = "path/to/output_pdf_with_page_numbers.pdf"  # Replace with desired output path

add_page_numbers(input_pdf_path, output_pdf_path)
These examples showcase how you can add watermarks or page numbers to an existing PDF using ReportLab in Python. Adjust the settings and texts according to your specific requirements.
Before reading further, explore the Quora-sourced revelations on the best Python libraries for crafting PDFs! Unravel the community’s top picks and expert opinions.
PyFDF
PyFPDF is a popular library for Python PDF generation, offering an easy-to-use interface for creating PDFs with text, images, and basic shapes.
What it supports:
- Text and font customization.
- Image embedding.
- Basic shapes like rectangles, ellipses, etc.
- Page templates.
Python Script:
Here’s an example using PyFPDF:
from fpdf import FPDF

class PDF(FPDF):
    def header(self):
        self.set_font('Arial', 'B', 12)
        self.cell(0, 10, 'PyFPDF Example', 0, 1, 'C')

    def chapter_title(self, title):
        self.set_font('Arial', 'B', 12)
        self.cell(0, 10, title, 0, 1, 'L')
        self.ln(5)

    def chapter_body(self, body):
        self.set_font('Arial', '', 12)
        self.multi_cell(0, 10, body)
        self.ln()

def generate_pdf(file_name):
    pdf = PDF()
    pdf.add_page()
    pdf.chapter_title('Chapter 1')
    pdf.chapter_body('This is an example using PyFPDF to generate PDFs.')
    pdf.output(file_name)

if __name__ == "__main__":
    generate_pdf('pyfpdf_example.pdf')
Explanation:
- A custom class `PDF` is created inheriting from `FPDF` to define header, chapter titles, and body.
- `generate_pdf` method creates a PDF object, adds a page, and includes chapter title and body text.
Running the Python Code:
Save this script in a file, e.g., `pyfpdf_example.py`, and execute it to generate a PDF named `pyfpdf_example.pdf` in the same directory.
WeasyPrint
WeasyPrint is a CSS and HTML to PDF converter library for Python, allowing you to generate PDFs from HTML/CSS documents.
What it supports:
- HTML/CSS to PDF conversion.
- Advanced styling options using CSS.
- Support for web-based content conversion to PDF.
Python Script:
Here’s a basic example using WeasyPrin
fg
from weasyprint import HTML

def generate_pdf(file_name):
    html_string = "<h1>Hello, WeasyPrint!</h1>"
    HTML(string=html_string).write_pdf(file_name)

if __name__ == "__main__":
    generate_pdf('weasyprint_example.pdf')
Explanation:
The `generate_pdf` function takes an HTML string, converts it into a PDF using WeasyPrint, and saves it as a file.
Running the Python Code:
Save this script in a file, e.g., `weasyprint_example.py`, and execute it to generate a PDF named `weasyprint_example.pdf` in the same directory.
Note: Running these Python scripts will generate PDFs based on the specified libraries, showcasing their respective functionalities and capabilities.
Would you be interested in discovering the process of generating Word documents with Python? Delve into the comprehensive, step-by-step guide provided in the blog.
How to generate multiple PDFs from Excel data using python?
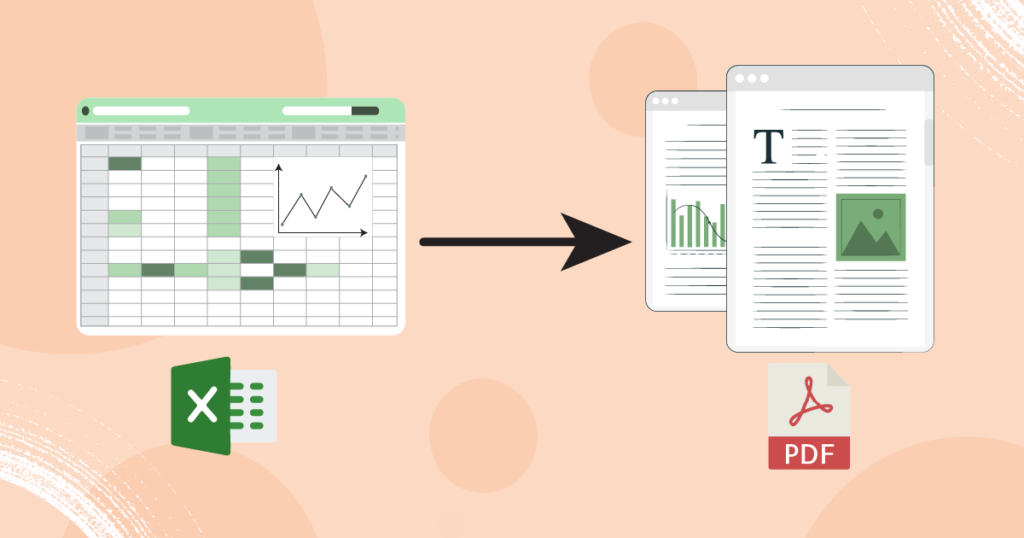
You can generate multiple PDFs from Excel data using Python by utilizing libraries like Pandas for handling the data and ReportLab for creating PDFs. Here’s a basic example:
First, make sure you have the necessary libraries installed. You can install them via pip if you haven’t already:
import pandas as pd
from reportlab.pdfgen import canvas

# Read the Excel file
excel_file = pd.ExcelFile('data.xlsx')

# Iterate through each sheet in the Excel file
for sheet_name in excel_file.sheet_names:
    # Read the sheet into a Pandas DataFrame
    df = excel_file.parse(sheet_name)

    # Create a PDF for each sheet
    pdf_filename = f'{sheet_name}_thought_leadership.pdf'
    c = canvas.Canvas(pdf_filename)

    # Assuming df is the content you want to add to the PDF
    content = df.to_string()  # Convert DataFrame to string for demonstration

    # Write the content to the PDF
    c.drawString(100, 750, f"Thought Leadership Piece: {sheet_name}")
    c.drawString(100, 700, content)  # Write the content at specific coordinates

    # Save the PDF
    c.save()
This code reads each sheet from the Excel file, converts its content into a string (for demonstration purposes, you might want to format it better), and creates a separate PDF file for each sheet with the content.
Please adjust the content generation part (content = df.to_string()) based on your actual data structure and how you want it displayed in the PDF.
Remember, ReportLab provides extensive options to format and design the PDF content according to your requirements. You can use methods like drawString, drawImage, setFont, etc., to customize the appearance of your PDF.
Make sure to replace ‘data.xlsx‘ with the actual path and name of your Excel file, and tailor the Python PDF generation according to your desired content layout and styling.
Now, let’s create an identical report using CRM data
Generating multiple PDFs using CRM data in Python typically involves a few steps:
- Retrieve CRM Data: Connect to your CRM system (Salesforce, HubSpot, etc.) using their API or export the data in a structured format (CSV, JSON, etc.).
- Parse and Organize Data: Read the CRM data into Python, organize it, and prepare it for the PDF generation process. Pandas is often used for data manipulation and organization.
- Generate PDFs: Use a library like reportlab, pdfkit, or fpdf to create PDFs. This involves defining the structure, layout, and content of the PDFs based on the CRM data.
Here’s an example using reportlab, a popular library for Python PDF generation:
from reportlab.lib.pagesizes import letter
from reportlab.pdfgen import canvas

# Sample CRM data
crm_data = [
    {'name': 'John Doe', 'email': 'john@example.com'},
    {'name': 'Jane Smith', 'email': 'jane@example.com'},
    # Add more CRM data here...
]

# Function to generate PDFs
def generate_pdf(data):
    for entry in data:
        # Create a new PDF
        pdf_filename = f"{entry['name']}_details.pdf"
        c = canvas.Canvas(pdf_filename, pagesize=letter)

        # Add content to the PDF
        c.drawString(100, 750, f"Name: {entry['name']}")
        c.drawString(100, 730, f"Email: {entry['email']}")
        # Add more content as needed

        # Save the PDF
        c.save()

# Generate PDFs using CRM data
generate_pdf(crm_data)
Replace the crm_data variable with your actual CRM data structure. The generate_pdf() function loops through each entry in the CRM data, creates a new PDF for each entry, adds content to the PDF (such as name and email), and saves the PDF with a filename based on the person’s name.
Remember to adjust the PDF content and structure according to your CRM data fields and how you want the PDFs to look.
Note: For more complex layouts, you might need to define functions/classes to handle different templates or layouts, handle pagination, include images, and format the PDFs more extensively based on your CRM data.
Tips for Optimizing Python PDF Generation Performance
Python stands tall in data manipulation and document generation, especially when it comes to crafting PDFs. But you know, getting those PDFs to generate efficiently? That can be a bit tricky. Sometimes things slow down or get a bit too resource-hungry. Here’s the lowdown on optimizing Python’s PDF game. These tips? They’re all about speeding things up, cutting down on the extra stuff, and making Python’s PDF game top-notch. Let’s dive in!

1. Choose the Right Library:
Picking the right library is a big deal when it comes to making Python PDFs work their best. You’ve got choices like PyPDF2, ReportLab, and PDFMiner, all with their own pros and cons in terms of performance. Take a good look at what your project needs and go to the library that fits those needs the best. That way, you’ll get things done efficiently.
2. Simplifying Content Handling:
When it comes to handling content, streamlining is the name of the game! You want to make sure you’re not doing extra work, right? So, try to cut down on unnecessary steps when you’re dealing with data for that PDF. Think about tweaking how you process things, maybe by making data structures more efficient and skipping any repetitive tasks. Also, using generators instead of lists wherever you can will help save memory.
3. Leverage Asynchronous Programming:
When you’re handling a massive load of document creation, jumping into asynchronous programming can seriously revolutionize your workflow. Have you heard of libraries like `asyncio`? They’re a lifesaver! They let different tasks run at the same time, making things way faster, especially when you’ve got loads of data to handle. It’s all about managing those tasks smartly, especially when they’re tied up waiting for input or output stuff.
4. Cache Reusable Elements:
Have you thought about spotting those bits you can recycle in your PDFs? Like, the headers, footers, or templates?
That’s a smart move! When you stash these away, it stops the system from doing repetitive work or redraws. It’s not just about making things faster; it also keeps everything looking uniform across lots of pages or docs.
5. Optimize Image Handling:
Handling images in Python when generating PDFs can sometimes slow things down a bit. It’s helpful to use tricks like compressing images, resizing them to the right size, and converting them into formats that work better for PDFs, such as JPEG or PNG. That way, you can shrink the file size and make sure the PDFs load faster and look sharper.
6. Fine-tune Font Usage:
You want to be smart about your font choices when working on documents. Try sticking to a few key fonts or using system fonts instead of loading up on a bunch of different ones. This will also make your files smaller and help them load faster.
7. Monitor Resource Utilization:
Keep a close eye on resource consumption during Python PDF generation. Monitor CPU, memory, and disk usage to identify any inefficiencies or bottlenecks. Profiling tools like cProfile can help pinpoint performance bottlenecks within your code.
Hey, when you’re working on generating PDFs in Python, it’s important to watch how much of your resources you’re using. Keep an eye on your CPU, memory, and disk usage. If something’s not running smoothly, tools like cProfile can be a huge help for figuring out exactly where your code might be slowing things down.
8. Opt for Incremental Writing:
Have you thought about trying out incremental writing techniques? It’s a neat way to tackle big documents. Instead of holding off until everything’s done, try breaking it down and writing bit by bit. It’s a smoother way to work and can save you from handling too much info all at once, making the process more efficient.
9. Regular Updates and Optimization:
It is indeed a good call to keep an eye on those PDF generation libraries and their dependencies. When the libraries get updates, they usually bring better performance and fix bugs, which is always a plus. Also, don’t forget to keep tweaking your code based on how it’s performing out there and what users are saying. That real-world feedback can be gold for making things run smoother.
10. Benchmark and Iterate:
You’d be surprised how much impact bench marking can have. It’s really about creating these performance standards to track how things are improving. By setting benchmarks, you’re able to see the progress more clearly. It’s all about trying out new strategies, tweaking things, and then comparing the results. That’s how you consistently make things better.
Pros and Cons of generating PDFs through Python
Python offers an extensive array of tools and libraries specifically made for crafting PDFs, allowing you to create a whole range of documents, from simple reports to detailed invoices and beyond. These libraries don’t just stop at the basics—they’ve got features like password protection, encryption, and digital signatures, ensuring robust data security.
What’s even better? Many of these Python libraries for PDF creation are open-source, meaning no need to worry about shelling out for licenses. That accessibility makes them easy to get your hands on.
But wait, there’s more! Python smoothly connects with various data sources—think databases, CSV files, and web APIs, making it a top pick for automating the generation of reports. It’s all about that seamless integration!
On the flip side, let’s talk about the drawbacks.
Creating detailed PDFs with exact formatting can be tricky, especially for those just starting out with Python. When you’re working on these, you might notice that it uses up a fair bit of memory and CPU, especially when handling a bunch of them at once or making massive ones.
Python’s way of making PDFs usually happens behind the scenes and needs a good grip on the libraries you’re using to create those fancy layouts. Remember that how fast it happens can change depending on which library you’re using and how complicated your PDF is. If you’re dealing with big or highly detailed PDFs, be ready to allocate quite a bit of system resources for the task.
Are you facing challenges in generating documents? click to discover a range of tools that can help overcome these challenges.
And ofcourse there is an alternative!
If your Python skills are limited and you operate a business requiring the creation of over 1000 documents daily, depending solely on Python for document generation can pose significant challenges. However, there’s an alternative solution: employing document generation software such as Perfect Doc Studio. Keep reading to simplify your workflow.
The Power of Perfect Doc Studio in Simplifying Document Generation
Navigating the complex world of modern businesses often hinges on smooth processes. One big challenge? Creating documents efficiently.
That’s where Perfect Doc Studio steps in!
It’s a game-changer in document generation, offering ready-made templates and an easy drag-and-drop system. There is no need for coding or design skills—this tool simplifies everything. Its user-friendly interface and loads of templates speed up document creation, making things quick without sacrificing quality.
But it doesn’t stop there. Perfect Doc Studio excels in providing customizable layouts, data embedding capabilities, and impeccable PDF output quality, catering to individuals prioritizing efficiency and a smoother document creation process overall.
Experience the sophistication and efficiency of Perfect Doc Studio—a catalyst for innovation and efficiency in the realm of document generation.
Conclusion
Python’s PDF generation capabilities provide a flexible solution for crafting a variety of documents and reports. This proves especially advantageous for Python-savvy individuals aiming to personalize their PDFs with text, graphs, and more.
However, for newcomers to Python or those aspiring to create intricate designs, navigating this process could be challenging. Developing complex layouts might prove difficult and could potentially lead to system performance issues.
For those proficient in Python and looking to generate PDFs, it’s certainly worth delving into. Yet, for those seeking highly sophisticated PDFs or just starting out might encounter complexities. In such instances, as previously mentioned, Perfect Doc Studio stands out as an invaluable resource. This specialized PDF generation tool enables users to effortlessly design professional and refined templates without the need for coding skills.
PDF QR Code Generator : How To Create QR Code For PDF?
Have you wondered how the QR codes automatically link you to PDFs when scanned? In today’s fas

Top 10 AI-based document generation software
Once merely a buzzword, “AI” has rapidly evolved into an indispensable component of our daily li

What is document generation? A Guide to generate documents in the right way.
Introduction Have you wondered about any documents sent by a bank or financial institution, like mon