5 Best Ways to Generate Word Documents from Excel (Mail Merge, VBA & More)
Do you spend too much time copying data from Excel to Word? You’re not alone! Many of us remember the hassle of creating a new Word document, copying information, and filling in the blanks, hoping we didn’t miss anything. It can be stressful if something is off or misaligned. That’s why we’ve put together a simple guide to demonstrate five easy ways to create Word documents using Excel data.
Technology has rewritten the rules–literally and figuratively. With tools that automate the process, it’s satisfying to see well-crafted Word documents generated from Excel in a matter of seconds. Regardless of whether you’re sending customer invoices, generating contracts, or compiling reports, generating Word documents from Excel makes the job easy.
This blog explores various ways to generate Word documents from Excel, including methods like Mail Merge and VBA for Word documents. It also offers some easy-to-follow steps, whether you’re a beginner or a professional, guiding you on your document generation journey.
Curious about how automation can help you with your documents workflow? Read our in-dept guide on ways to generate dynamic document in 2025 for the most common approaches.
Youtube text: If you want a quick visual breakdown of multiple approaches, check out our video: 5 Best Methods to Convert Excel to Word (Fast & Easy)
Ways to Automate Word Documents Creation from Excel
There are quite a few methods to automate Word documents from Excel: from programming languages to software and web-based tools. Even our trusted old buddy Microsoft comes equipped with Power Automate. By mastering these techniques, you can efficiently generate Word documents from Excel for any business need.
Method 1: No-Code Platform : Perfect Doc Studio
If you’re looking for a quick, no-code way to turn Excel data into dynamic documents, Perfect Doc Studio is a tool worth exploring. It automates document creation and delivery of customized emails, WhatsApp messages, SMS, and more. PDS works with simple spreadsheets or connects through APIs or Zapier and manages the entire process in one place, without scripting. A freemium version is available, so you can try it out!

Here’s how Perfect Doc Studio works:
Firstly, you need to start off with a smart template from the content library. These templates are built to be dynamic, in terms of the content, layout, and design, based on the data you feed. So it’s easy to use the drag-and-drop editor to personalize documents.
Once the template is completed, it pulls in data from CRMs, Excel sheets, or APIs to auto-generate content (in 108 languages) and assembles it. Behind the scenes, a structured workflow ensures everything is working properly, whether you’re processing in real-time or scheduling batches. For compliance and security, role-based access ensures the right people see and control the right parts of the document.
Perfect Doc Studio automates decisions, design, and delivery on a single platform, available as both a SaaS version and an on-premise model.
Method 2: Microsoft Word Mail Merge Excel to Word
Mail Merge is the oldest and most accessible method of document generation for small and medium volume needs.Using Mail Merge, you can easily automate the process of sending out letters and invitations. This Excel Mail Merge tutorial will guide you through the steps to export Excel data to Word effectively.
Here’s how mail-merge-based document generation works:
Firstly, a base document should be created on Microsoft Word with special placeholders for dynamic data (like <First Name>, <Address>, or <Policy Number> ). The next step is to integrate a data source such as a Microsoft Excel file or a CSV into the template.
The Excel file contains a different set of data to populate the merge fields, and Word uses mail merge to generate personalized documents for each row of data.
A Step-by-Step Guide (Microsoft Word + Excel):
- The first step is to create your Excel file with headers in the first row and all the data mentioned under it.
- Next, you open Microsoft Word and draft a document or open a template and go to the Mailings tab → Start Mail Merge → New Word Document
- After that, click on Select Recipients → Use an Existing List and choose your Excel file
- Place the cursor wherever you want the personalized or dynamic content to appear in the Word Document.
- Then click on the Insert Merge Field and select the name of the column (for instance: << First_Name>>). Repeat this process for each dynamic content.
- Use the Preview Results tab to check if everything is as you expect in the final document.
- Once everything is set, click on Finish & Merge and select Edit Individual Documents, Print Documents, or send Email Messages to generate the final outputs.
Below is a video link that guides users in performing a mail merge from Microsoft Excel to Microsoft Word in order to produce mass mailings to a group of people.
For a more detailed walkthrough on automating Word documents from Excel with Power Automate Desktop, read our tutorial and discover advanced tips for Power Automate Desktop.
Method 3: VBA (Visual Basic for Applications) – Built into Excel and Word
VBA is a more sophisticated method than mail merge, which is not only basic but also accessible to those without technical expertise. On the other hand, VBA requires technical professionals to create VBA macros to define specific documentation rules. The transition from Excel to Word can be seamless when using the right tools and techniques.
Here’s how VBA-based document generation works:
VBA-based document generation uses VBA programming, which is integrated with Microsoft Office applications like Word and Excel to manipulate document elements, insert data, format text, and create complex documents based on templates or data sources.
Let me paint you a picture: a VBA script can generate a policy summary and a claims report from the same data, provided the user applies different formatting and content rules for each document type.
A Step-by-Step Guide (Microsoft Word + Excel):
1.Firstly, create a spreadsheet with columns like Name, Email, Address, and so on.
2.Then, you can start drafting your Word template, make sure to include place holders that correspond to the column headers in your spreadsheet:
Dear <Name>
We would like to inform you at your address <address> that…
Once you complete your draft, save it as template.docx.
3.Now, open Excel and Press Alt + F11 to open the VBA Editor and create a new VBA module by clicking on the Insert menu bar in the VBA Editor → select Module → insert a new module → paste your script.
Sub GenerateLetters()
    Dim wordApp As Object
    Dim doc As Object
    Dim ws As Worksheet
    Dim templatePath As String
    Dim outputPath As String
    Dim i As Integer

    Set ws = ThisWorkbook.Sheets("Sheet1")
    templatePath = "C:\Path\To\Template.docx" ' Update path
    outputPath = "C:\Path\To\GeneratedDocs\" ' Update path

    ' Start Word
    Set wordApp = CreateObject("Word.Application")
    wordApp.Visible = False

    ' Loop through each row of data
    For i = 2 To ws.Cells(ws.Rows.Count, "A").End(xlUp).Row
        Set doc = wordApp.Documents.Open(templatePath)

        ' Replace placeholders
        With doc.Content.Find
            .Execute FindText:="", ReplaceWith:=ws.Cells(i, 1).Value, Replace:=2
            .Execute FindText:="", ReplaceWith:=ws.Cells(i, 2).Value, Replace:=2
            .Execute FindText:="
", ReplaceWith:=ws.Cells(i, 3).Value, Replace:=2 End With ' Save as new document doc.SaveAs2 outputPath & "Letter_" & ws.Cells(i, 1).Value & ".docx" doc.Close Next i wordApp.Quit Set wordApp = Nothing MsgBox "Letters generated successfully!"

End Sub

This will loop through each row, ensuring all the placeholders are replaced with the data in the columns, and you have a personalized document for each row.
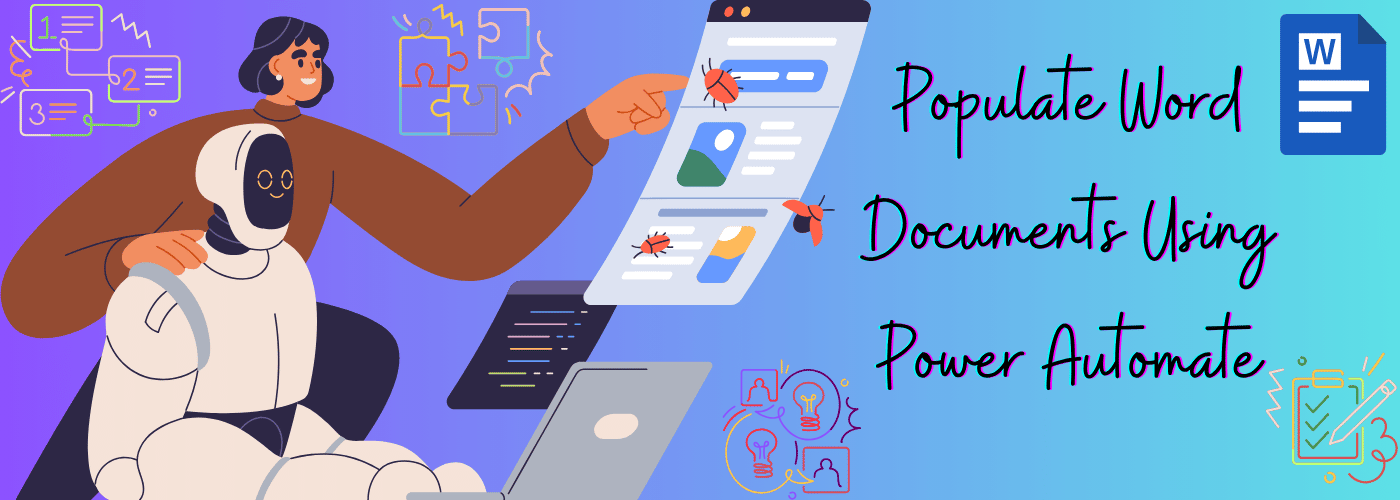
Method 4: Microsoft Power Automate Desktop (No Code)
Microsoft Power Automate allows for no-code document generation using content assembly in Microsoft Syntex. Power Automate–with its intuitive interface, connectors, drag-and-drop components, and workflows–meets document automation needs. Power Automate is a powerful tool that allows you to automate Word document creation without any coding skills.
Here’s how Power Automate Desktop-based Word document generation works:
Power Automate’s intuitive interface records your manual document creation steps, including opening files, copying data, formatting text, and saving documents. It then converts these recorded actions into an automated workflow.
Power Automate Desktop can read data from various sources, such as Excel spreadsheets, SharePoint lists, or even web applications, and populate the data into Word Templates, PDFs, and other document formats. It uses a visual workflow designer with a drag-and-drop pre-built actions to create sophisticated automation.
A Step-by-Step Guide (Microsoft Word + Excel):
1.You’ll need to install Power Automate Desktop (free from the Microsoft Store).
2.Create a spreadsheet with columns like Name, Email, Address, and more. Save this file (Data.xlsx).
3.Then, you can start drafting your Word template and save it as template.docx, make sure to include place holders that correspond to the column headers in your spreadsheet:
Dear <Name>
We would like to inform you at your address <address> that…
Once you complete your draft, save it as template.docx.
4.Once you have the Excel file and Word template ready, go to Power Automate Desktop and click on New Flow → Name it, e.g., Generate Word Letters
5.The next step is to create variables and set up file paths.
Add Action: Set Variable
a. Name: TemplatePath
b. Value: C:\Path\To\Template.docx (Update Path to your template file)
Add Action: Set Variable
c. Name: OutputFolder
d. Value: C:\Path\To\GeneratedDocs\ (Update Path to your output folder)
6.After this, you’ll need to read the Excel data
Add Action: Launch Excel → and open the following document (Put the document path)
Enable Make instance visible
Path: C:\Path\To\Data.xlsx
Add Action: Read from Excel worksheet
Path: C:\Path\To\Data.xlsx
Add Action: Read from Excel Worksheet
Retrieve: All available values from the worksheet
Store in: ExcelData
Add Action: Close Excel → Enable Save = No
7.Then, all that is left to be done is to loop through the data rows
Add Action: For Each (Loops)
Value to iterate: %ExcelData%
Store into: CurrentRow
Inside the loop:
Add Action: Launch Word
→ With a new blank document
Add Action: Launch Word → and open the following document
File path: %TemplatePath% (Update Path to your template file)
Add Action: Find and replace words in Word document (Do this for each placeholder)
Word Instance: %WordInstance%
Text to find:
Replace with: %CurrentRow[0]%
(Assumes first column is Name) and match whole words only
Similarly:
%WordInstance% →
→ %CurrentRow[1]%Add the necessary actions for your template.
Add Action: Save Document As
Word Instance: %WordInstance%
Document Format: Default (From Extension)
Path: %OutputFolder%\Letter_%CurrentRow[0]%.docx (Refer to the path to the output folder that was created)
Add Action: Close Word Document
And store it in the same Word instance.
8.The last step is to end the flow.
Optionally add a Display Message: Documents generated successfully!
Method 5: Python-Based Document Generation (Using python-docx & openpyxl)
Python-based document generation requires a basic programming language. With its straightforward syntax, it is handy when using specialized libraries like Python-docx for Word documents and openpyxl for Excel integration.
Prerequisites:
pip install python-docx and openpyxl
A Step-by-Step Guide (Using python-docx & openpyxl):
- The first step is to install the required library and integrate it with Excel. To do so, change the path to the Python scripts folder in the Windows command prompt.
- Execute pip install python-docx and openpyxl.
- Copy the below code into a .py file (for instance, document_generation.py) and keep it in the document generation project folder.
- Change the template path, Excel path, and output path to match your system. Below is the sample script:
- In the command prompt, use the keyword Python D:\doc_gen\document_generation.py (replace this with the actual file path on your system) to run the code and hit enter
- All the files will be generated in your output folder.
from openpyxl import load_workbook
from docx import Document
import os

# Paths
TEMPLATE_PATH = 'C:/Path/To/template.docx'
EXCEL_PATH = 'C:/Path/To/data.xlsx'
OUTPUT_DIR = 'C:/Path/To/output_docs/'

# Load Excel workbook
wb = load_workbook(EXCEL_PATH)
sheet = wb.active

# Get column headers (assuming first row has headers)
headers = [cell.value for cell in sheet[1]]

# Iterate through each row (starting from second row)
for row in sheet.iter_rows(min_row=2, values_only=True):
    # Map headers to row values
    data = dict(zip(headers, row))

    # Load Word template
    doc = Document(TEMPLATE_PATH)

    # Replace placeholders in paragraphs
    for para in doc.paragraphs:
        for key, value in data.items():
            placeholder = f"<{key}>"
            if placeholder in para.text:
                para.text = para.text.replace(placeholder, str(value))

    # Save personalized document
    output_filename = f"Letter_{data['Name']}.docx"
    doc.save(os.path.join(OUTPUT_DIR, output_filename))

print("Documents generated successfully!")
Youtube text: You can also follow along with our YouTube guide: Create Word Documents from Excel using Python.
Want to learn more about Python-based document generation. Read our comprehensive blog to get more information!
As a bonus, I’ve included a method for Spreadsheet-based document generation as well.
Looking for more? See the latest trends in omnichannel communications: Top Customer Communication Management (CCM) Trends in 2025
Spreadsheet-Based Document Generation
This is a beginner-friendly and common method. Creating a reusable document template through pre-defined structures with placeholders or merge fields has become the most widely used type of document generation. Most standardized documents require constant formatting, and this method is one of the best for it.
Here’s how spreadsheet-based document generation works:
Firstly, a template file should be created on a word processor like Microsoft Word or Google Docs, or a markup language like HTML5. This template would identify common elements, variable fields, and conditional content scenarios.
The next step is to integrate data sources such as CRM systems, policy databases, compliance repositories, and even something as simple as a spreadsheet. Finally, business rules are configured to determine content inclusion based on specific criteria. For example, insurance policy documents might include different coverage sections based on policy type and customer demographics.
A Step-by-Step Guide (Google Docs + Sheets):
- You need to create a Google Docs template with placeholders like <>.
- Then, prepare a Google sheet with column headers that match the placeholders (the column headers should also be titled Name).
- Use the Autocrat add-on (automates the creation of personalized documents and emails) to merge data into the document.
- Open the Autocrat extension on sheets, New Job→ locate the template, and select it.
- Next, Autocrat will fetch the placeholders you’ve included in the document.
- Then, map each tag to the corresponding column on the spreadsheets.
- Finally, decide how you want your file to be named, the format you want it in (PDF or Google Docs), and your output modes.
- The last step is to choose your destination folder, and Autocrat will generate a PDF or Google Doc for each row of data.
There are also optional capabilities like Dynamic Folder References, Merge Conditions, delivery options (with options to insert merge tags in emails as well), and trigger-based document generation.
Below is a video link that guides users in generating documents effortlessly using Autocrat to Mail Merge from Google Sheets into Docs, Slides, or PDF files.
We’ve made a structured comparison of all the common methods:
| Feature / Method | Perfect Doc Studio | Mail Merge (Word) | VBA (Excel + Word) | Power Automate Desktop | Python Script (Docx + Excel) | Spreadsheet-Based (Excel/Sheets) |
|---|---|---|---|---|---|---|
| Type | No-code SaaS platform | Built-in Office feature | Scripting in Excel/Word (VBA) | GUI-based desktop automation tool | Code-based scripting with libraries | Manual or semi-automated formula-based |
| Ease of Use | Very Easy (non-technical users) | Easy (for basic letters/emails) | Medium (requires basic coding) | Easy to Medium (visual steps) | Technical (Python knowledge needed) | Easy (for Excel users) |
| Customization | High (template editor, logic, languages) | Basic (placeholders only) | High (can add logic, loops, conditions) | Medium (structured steps, less logic) | Very High (full coding control) | Low to Moderate (limited logic) |
| Data Input Sources | Excel, APIs, web forms, CRMs | Excel or Outlook | Excel (from the same workbook) | Excel, CSV | Excel, CSV, JSON, Databases | Manual data entry or formulas |
| Output Formats | DOCX, PDF, HTML, email, and language versions | DOCX, email | DOCX, PDF (via Word export) | DOCX | DOCX (PDF via extra libraries) | Printable cells / exported PDFs |
When to use each method?
Use Case / Scenario |
Recommended Tool |
|---|---|
| Business-grade automation & multilingual templates | Perfect Doc Studio |
| One-time personalized documents (letters, invites) | Mail Merge |
| Small internal reports or labels from a spreadsheet | Spreadsheet-Based Generation |
| Customized, logic-driven document creation | VBA |
| Easy GUI automation with minimal code | Power Automate Desktop |
Ultimately, whether you choose to create Word documents with Excel through Mail Merge or automate Word document creation using VBA, the right method depends on your specific needs. A bigger organization might prefer Perfect Doc Studio. On the other hand, a freelancer might find Mail Merge, even with its limited capabilities, the most suitable for his or her needs.
While there are many methods out there, just remember:
- Mail Merge is quick, easy, and predictable
- Spreadsheet generation is simple and satisfying
- VBA is a toolbox where you have to make sure everything works
- Power Automate transforms you into a drag-and-drop expert
- And Python? It offers various capabilities, as long as you know how to work it
But if you want power, scalability, and ease of use, then Perfect Doc Studio is the right choice for you. Try now for free.
FAQs
You can use methods such as Mail Merge, VBA macros, no-code tools like Perfect Doc Studio, Microsoft Power Automate Desktop, or Python scripting. Each of these lets you automate the process, save time, and reduce manual errors.
Mail Merge is a built-in feature in Microsoft Word that enables you to use an Excel spreadsheet as a data source, automatically merging rows from Excel into Word templates to generate personalized documents such as letters, invoices, or forms.
Not necessarily. No-code platforms (like Perfect Doc Studio) and tools such as Mail Merge or Microsoft Power Automate Desktop let you create and automate documents without writing any code. More advanced tasks—like customization or integration—might require programming knowledge, particularly with VBA or Python.
Mail Merge is ideal for basic personalization and bulk document creation by non-technical users. VBA offers much greater flexibility and automation possibilities for those with programming skills, letting you set up advanced rules, custom formats, and complex workflows.
Yes. Many document generation tools (including Perfect Doc Studio, Power Automate Desktop, and advanced Mail Merge setups) support automated delivery through email, either as attachments or embedded content, streamlining communication with customers or team members.

PDF QR Code Generator : How To Create QR Code For PDF?
Have you wondered how the QR codes automatically link you to PDFs when scanned? In today’s fas

Capabilities of document generation software in 2023
If you are a programmer, you might be looking for a way to make the people who use the program you m
Word Document Automation Using Power Automate Desktop
This guide walks you step by step through the entire process—from setting up templates and configu